
MicrocosmWorksInovasi dan Arsitektur Kosmos Digital
TentangKontak
MicrocosmWorksInovasi dan Arsitektur Digital Cosmos

Menyediakan solusi IT yang penting. Kami bersemangat tentang teknologi, keamanan, dan membantu bisnis tumbuh melalui infrastruktur IT yang andal dan inovatif.

[email protected]
+91 7011868196
New Delhi, India

Pusat Pertumbuhan AI

AI HubInovasi StartupAkselerator Perusahaan

Solusi

Semua SolusiAplikasi Kesehatan & KebugaranPlatform Video AIPengembangan Agen AI

Sumber Daya

WawasanPanduan IndustriCetak Biru Kasus PenggunaanPola ArsitekturStudi Kasus

Perusahaan

Tentang KamiKontakPekerjaan Kami

Layanan

Konsultasi DigitalInfrastruktur CloudPengembangan SaaSPengembangan AITeknologi Video
Pengembangan ERPKustomisasi ZohoPengembangan OdooIntegrasi SalesforcePengembangan CRM Kustom
Integrasi QuickBooksSolusi IoTPengembangan Blockchain
Konsultasi Keamanan SiberDukungan IT - L3

ยฉ 2026 MicrocosmWorks. Semua hak dilindungi.

Kebijakan PrivasiSyarat Layanan
Kembali ke Wawasan
Digital Consulting

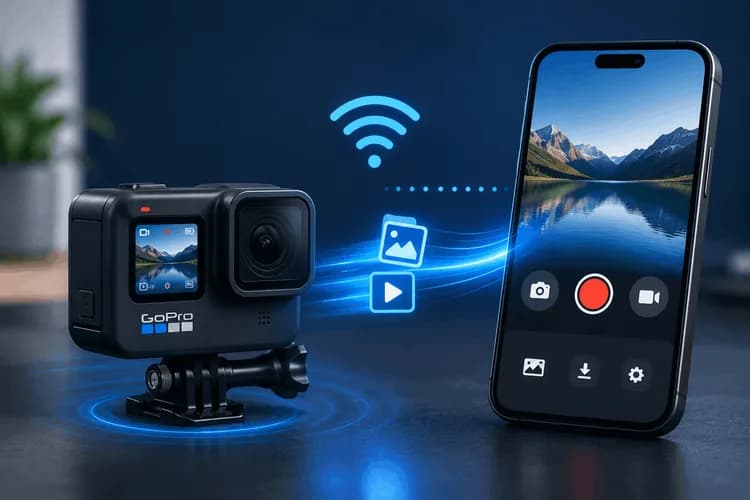
Controlling a GoPro Over WiFi in Flutter: The Open GoPro HTTP API, Keep-Alives, and Streaming File Transfer

Connecting to a GoPro over WiFi from Flutter using the Open GoPro HTTP API, with keep-alives and streamed file transfer.

Manya Garg
โ€ข
July 13, 2026

Real-Time GPU Video Filters in Flutter: Presets, Adjustments, and Live Preview

One slider, three renderers: how we built Instagram-style video filters with GPU shaders for preview, Skia color matrices for everywhere else, and FFmpeg for export โ€” and kept them all telling the same visual story.


Filters look easy. Video filters aren't.

Applying a sepia tone to an image in Flutter is a one-liner โ€” wrap it in a ColorFiltered widget and you're done. Applying it to a video is a different sport entirely:

  • The preview must run at 30โ€“60 fps on top of a playing video, on whatever device the user owns.
  • The user must be able to drag sliders (brightness, contrast, hue, temperatureโ€ฆ) and see the result live.
  • And the cruel part: when they hit Export, the burned-in MP4 must look like what they previewed โ€” but your preview renderer (Flutter/GPU) and your export renderer (FFmpeg) are completely different engines that have never heard of each other.

This post is about how we built that pipeline in a Flutter video editor: a filter catalog with presets and per-parameter adjustments, a live preview that picks the cheapest renderer that can do the job, and an FFmpeg export path that reproduces the look. The headline lesson up front:

Every filter ends up implemented three times โ€” as a GPU shader configuration, as a Skia 4ร—5 color matrix, and as an FFmpeg filter string โ€” all driven by one shared parameter map. The real engineering is keeping those three reimplementations visually consistent.


The architecture: one parameter map, three renderers

                       โ”Œโ”€โ”€โ”€โ”€โ”€โ”€โ”€โ”€โ”€โ”€โ”€โ”€โ”€โ”€โ”€โ”€โ”€โ”€โ”€โ”€โ”€โ”€โ”€โ”€โ”€โ”€โ”€โ”€โ”
                       โ”‚   shared parameter map     โ”‚
                       โ”‚ {filterId, params, 0โ€“1     โ”‚
                       โ”‚        intensity}          โ”‚
                       โ””โ”€โ”€โ”€โ”€โ”€โ”ฌโ”€โ”€โ”€โ”€โ”€โ”€โ”€โ”ฌโ”€โ”€โ”€โ”€โ”€โ”€โ”€โ”ฌโ”€โ”€โ”€โ”€โ”€โ”€โ”˜
                             โ”‚       โ”‚       โ”‚
              โ”Œโ”€โ”€โ”€โ”€โ”€โ”€โ”€โ”€โ”€โ”€โ”€โ”€โ”€โ”€โ”˜       โ”‚       โ””โ”€โ”€โ”€โ”€โ”€โ”€โ”€โ”€โ”€โ”€โ”€โ”€โ”€โ”€โ”€โ”
              โ–ผ                      โ–ผ                       โ–ผ
   GPU shader preview      Skia ColorFilter.matrix     FFmpeg -vf string
 (flutter_gpu_video_       (primary live preview,      (export โ€” the only
  filters, local clips)     universal fallback)         thing users keep)

The three paths exist because each one wins somewhere:

  1. GPU shaders (flutter_gpu_video_filters) give true shader-quality effects โ€” distortions, blurs, tone mapping โ€” but the package renders into its own surface and works best with local video files.
  2. Skia ColorFilter.matrix โ€” a 4ร—5 color matrix wrapped around the video widget with ColorFiltered โ€” is nearly free, works on any video widget (network streams included), and covers the most-used two dozen filters: brightness, contrast, sepia, grayscale, hue, duotonesโ€ฆ
  3. FFmpeg is the only renderer whose output the user actually keeps. Export re-derives every look as a filter-graph string (eq=, hue=, colorchannelmixer=โ€ฆ).

A small strategy router decides per-filter which preview engine to use:

// Which preview strategy can render this filter?
static FilterStrategy getFilterStrategy(String filterId) {
  if (_colorFilterIds.contains(filterId))         return FilterStrategy.colorFilter;
  if (_customPainterFilterIds.contains(filterId)) return FilterStrategy.customPainter;
  return FilterStrategy.exportOnly;
}

  • colorFilter โ†’ wrap the player in ColorFiltered(colorFilter: getColorFilter(id, params))
  • customPainter โ†’ stack a CustomPainter overlay on the video (vignette, pixelation, halftone โ€” things a color matrix can't express)
  • exportOnly โ†’ show the original video plus a badge telling the user the effect appears in the export

That router is the single most cost-effective decision in the system: it gives ~24 filters genuinely free real-time preview on every device, and reserves the heavyweight machinery for the filters that need it.


1. The filter catalog, presets, and adjustments

Each filter in the catalog is a tiny declarative item โ€” an id, a display name, a category, and (when the GPU path supports it) a factory for the shader configuration:

const GpuVideoFilterItem({
  required this.id,
  required this.name,
  required this.icon,
  required this.category,
  this.createConfiguration, // () => GPUFilterConfiguration, when GPU-capable
});

GPUFilterConfiguration? getConfiguration() => createConfiguration?.call();

Presets are just named parameter bundles pointing at a filter โ€” the "P1โ€“P5" quick looks in the UI:

static List<FilterPreset> get allPresets => [
  const FilterPreset(id: 'P1', name: 'Warm Vintage',
    filterId: 'sepia',     parameters: {'intensity': 0.8}),
  const FilterPreset(id: 'P2', name: 'Classic B&W',
    filterId: 'grayscale', parameters: {'intensity': 1.0}),
  const FilterPreset(id: 'P3', name: 'Vivid Colors',
    filterId: 'vibrance',  parameters: {'vibrance': 0.5}),
  const FilterPreset(id: 'P4', name: 'High Contrast',
    filterId: 'contrast',  parameters: {'contrast': 1.4}),
  const FilterPreset(id: 'P5', name: 'Cinematic',
    filterId: 'vignette',  parameters: {'vignetteStart': 0.3, 'vignetteEnd': 0.75}),
];

Adjustments are typed parameter descriptors with ranges, defaults, and even a gradient hint so each slider can render a meaningful track (blackโ†’white for brightness, a rainbow for hue):

case 'brightness':
  return [const FilterParameter(id: 'brightness', displayName: 'Brightness',
    minValue: -1.0, maxValue: 1.0, defaultValue: 0.0,
    gradientType: FilterParameterGradientType.blackToWhite)];
case 'contrast':
  return [const FilterParameter(id: 'contrast', displayName: 'Contrast',
    minValue: 0.5, maxValue: 2.0, defaultValue: 1.0,
    gradientType: FilterParameterGradientType.grayToWhite)];
case 'hue':
  return [const FilterParameter(id: 'hue', displayName: 'Hue',
    minValue: -180.0, maxValue: 180.0, defaultValue: 0.0, unit: 'ยฐ',
    gradientType: FilterParameterGradientType.rainbow)];

The current slider values live in an immutable state object, seeded from defaults:

factory FilterAdjustmentState.fromDefaults(String filterId, List<FilterParameter> parameters) {
  return FilterAdjustmentState(
    filterId: filterId,
    parameterValues: Map.fromEntries(parameters.map((p) => MapEntry(p.id, p.defaultValue))),
  );
}

And one UX detail that matters more than it looks: slider updates write to state immediately (so the thumb tracks the finger), but the preview re-render is debounced by 300 ms. Without the debounce, dragging a slider rebuilds the filtered video subtree dozens of times per second and the drag stutters; with it, the preview snaps to the final value the moment the finger slows down.

What gets persisted on the clip is deliberately minimal:

class Filters {
  final String? adjust;     // manually chosen filter id, e.g. 'sepia'
  final String? presets;    // preset id, e.g. 'P1'
  final double? intensity;  // 0.0โ€“1.0; null means 1.0 (only saved when < 1.0)
  final Map<String, double>? parameters; // per-filter slider values
}


2. Live preview, path by path

The workhorse: a 4ร—5 color matrix

Most of the catalog is color math, and Skia color matrices do color math for free. The filter manager turns a filter id + parameters into a ColorFilter.matrix:

static ColorFilter getColorFilter(String filterId, [Map<String, double> parameters = const {}]) {
  final matrix = _getColorMatrixWithParams(filterId, parameters);
  return ColorFilter.matrix(matrix);
}

Parameterized filters build their matrices on the fly. Two examples โ€” and note the ร—255, because matrix offsets live in 0โ€“255 color space:

case 'brightness':
  final brightness = (params['brightness'] ?? 0.0) * 255.0;
  return [1,0,0,0,brightness,  0,1,0,0,brightness,
          0,0,1,0,brightness,  0,0,0,1,0];
case 'contrast':
  final contrast = params['contrast'] ?? 1.0;
  final offset = -(0.5 * contrast) + 0.5;
  return [contrast,0,0,0,offset*255,  0,contrast,0,0,offset*255,
          0,0,contrast,0,offset*255,  0,0,0,1,0];

Filter intensity โ€” the global "how much of this look" slider โ€” is implemented as a straight interpolation between the effect matrix and the identity matrix:

final interpolatedMatrix = List<double>.generate(20, (i) {
  return identityMatrix[i] + (effectMatrix[i] - identityMatrix[i]) * intensity;
});

That one-liner gives every color filter a free 0โ€“100% strength control with zero extra shader or pipeline work.

The real GPU path

For local clips, the editor swaps in a true GPU-filtered surface from flutter_gpu_video_filters. The widget is keyed so changing clip or filter tears down and recreates the whole surface (the package's controller doesn't love hot config swaps mid-flight):

return GPUVideoSurfacePreview(
  key: ValueKey(filterKey), // '${clipIndex}_${filterId}' โ€” force full recreation
  configuration: _gpuFilterConfiguration!,
  onViewCreated: (controller, sizeStream) async {
    _gpuPreviewController = controller;
    if (_mainController != null && _isPlaying) {
      _mainController!.pause(); // avoid duplicate playback (and doubled audio!)
    }
    await controller.setVideoSource(FileInputSource(File(clipInfo.assetPath!)));
    if (mounted) setState(() => _isGpuPreviewInitialized = true);
  },
);

The shader configuration is assembled per filter from the package's typed configs, fed by the same parameter map the sliders write into:

case 'brightness':    return GPUBrightnessConfiguration()..brightness = getParam('brightness', 0.0);
case 'contrast':      return GPUContrastConfiguration()..contrast   = getParam('contrast', 1.0);
case 'saturation':    return GPUSaturationConfiguration()..saturation = getParam('saturation', 1.0);
case 'hue':           return GPUHueConfiguration()..hue = getParam('hue', 0.0);
case 'white_balance': return GPUWhiteBalanceConfiguration()..temperature = getParam('temperature', 5000.0);

Two lifecycle lessons paid for in debugging hours:

  • Pause the underlying player before the GPU surface starts. The GPU preview plays the video itself; forget the pause and you get two decoders playing the same clip โ€” including doubled, slightly offset audio.
  • Dispose properly on filter change: disconnect() the old configuration, create new preview params, connect() the new one, and dispose() the controller (plus cancel the size-stream subscription) when leaving the screen.

The desktop curveball

On desktop, the video backend renders into an external texture that bypasses Skia's layer compositing โ€” so wrapping the player in ColorFiltered silently does nothing; there's no Skia layer to transform. The workaround is to force rasterization of the underlying layer (e.g. an interposed BackdropFilter over a SizedBox.expand) so the color matrix has actual pixels to operate on. If your filters "work on Android but not on desktop," this is almost certainly why.


3. Export: rebuilding the look in FFmpeg

The preview is rented; the export is owned. At export time, the saved Filters model is resolved (a manually chosen filter takes precedence over a preset; preset ids are mapped back to their filter + parameters) and translated into an FFmpeg filter string:

switch (normalizedId) {
  case 'grayscale':  return 'hue=s=0';
  case 'sepia':      return 'colorchannelmixer=.393:.769:.189:0:.349:.686:.168:0:.272:.534:.131';
  case 'invert':     return 'negate';
  case 'brightness':
    final b = params?['brightness'] ?? 0.3;  return 'eq=brightness=${b.toStringAsFixed(3)}';
  case 'contrast':
    final c = params?['contrast'] ?? 1.5;    return 'eq=contrast=${c.toStringAsFixed(3)}';
  case 'saturation':
    final s = params?['saturation'] ?? 1.5;  return 'eq=saturation=${s.toStringAsFixed(3)}';
  case 'exposure':
    final e = params?['exposure'] ?? 0.4;    // FFmpeg eq has no exposure โ€” fake it with gamma
    final gamma = e >= 0 ? (1.0 - e * 0.5).clamp(0.1, 10.0)
                         : (1.0 / (1.0 + (-e) * 0.5)).clamp(0.1, 10.0);
    return 'eq=gamma=${gamma.toStringAsFixed(3)}';
  case 'hue':
    final h = params?['hue'] ?? 90.0;        return 'hue=h=${h.toStringAsFixed(1)}';
  case 'gaussian_blur':
    final sigma = (params?['sigma'] ?? 5.0).clamp(0.1, 50.0);
    return 'gblur=sigma=${sigma.toStringAsFixed(1)}';
  case 'vignette':   return "vignette='PI/4'";
  // swirl / bulge / toon / kuwahara / crosshatch ... โ†’ return '' (preview-only)
}

Intensity at export: the split/blend trick

Remember the preview implements intensity by lerping the color matrix toward identity. FFmpeg has no "matrix lerp" โ€” but it has stream compositing. So a partial-intensity export splits the video, filters one branch, and blends it back over the original at the saved opacity:

if (intensity >= 0.99) {
  command = ['-i','"$videoPath"','-vf', filterCommand,
    '-c:v','libx264','-preset',options.preset,'-crf','${options.crf}',
    '-c:a','copy','-movflags','+faststart','-y','"$outputPath"'].join(' ');
} else {
  final opacity = intensity.toStringAsFixed(2);
  command = ['-i','"$videoPath"','-filter_complex',
    '[0:v]split[orig][tofilter];'
    '[tofilter]$filterCommand[filtered];'
    '[orig][filtered]blend=all_mode=normal:all_opacity=$opacity[out]',
    '-map','[out]','-c:v','libx264','-preset',options.preset,'-crf','${options.crf}',
    '-c:a','copy','-movflags','+faststart','-y','"$outputPath"'].join(' ');
}

It's not mathematically identical to the matrix lerp, but perceptually it lands close โ€” and it works for any filter string, not just color matrices.

The filter pass is one isolated re-encode in a longer export chain (canvas-fit โ†’ filter โ†’ effects โ†’ overlays โ†’ audio mix โ†’ concat), with -c:a copy keeping audio untouched until the dedicated mixing stage, and the source duration probed at every stage to catch drift early.


4. The parity table: where three renderers agree โ€” and where they don't

This is the part nobody writes about. One stored value, three interpretations:

ParameterSlider rangeGPU shaderSkia matrixFFmpeg export
brightnessโˆ’1 โ€ฆ 1native โˆ’1โ€ฆ1offset = v ร— 255eq=brightness=v
contrast0.5 โ€ฆ 2nativediagonal v, offset re-centeredeq=contrast=v
saturation0 โ€ฆ 2nativeRec.709 luma-weighted blendeq=saturation=v
exposureโˆ’1 โ€ฆ 1linear gainlinear gainfaked via gamma curve
hueโˆ’180ยฐ โ€ฆ 180ยฐnativefull cos/sin rotation matrixhue=h=v
sepiaintensityshadermatrix .393/.769/.189โ€ฆcolorchannelmixer โ€” same coefficients, exact parity
intensity0 โ€ฆ 1preset multiplierlerp matrix โ†’ identitysplit + blend=all_opacity

Hard-won parity lessons:

  • Pick one filter as your ground truth. Sepia achieves exact parity because the identical 3ร—3 coefficients appear in both the Skia matrix and FFmpeg's colorchannelmixer. Build that one first and use it to validate your pipeline end to end.
  • Beware unit mismatches. The Skia brightness offset is in 0โ€“255 space while the GPU shader works in โˆ’1โ€ฆ1 โ€” the same slider value is dramatically more aggressive on one path unless you normalize deliberately.
  • Some mappings are approximations, and that's a decision. FFmpeg's eq has no exposure control, so export approximates exposure with an inverse gamma curve. Linear-gain preview vs. gamma-curve export diverge in the shadows. Acceptable? Maybe โ€” but decide it consciously and write it down.
  • Watch for parameters that silently degrade. In an early version, the white-balance Kelvin slider drove the GPU preview beautifully โ€” while the export emitted a hard-coded color temperature. The user dragged a slider that did nothing to their final video. Audit every parameter across all three paths.
  • Preview-only filters must say so. Distortion and stylize effects (swirl, bulge, toon, kuwaharaโ€ฆ) exist only as GPU shaders; their export translation returns an empty string and the pipeline passes the original video through. The UI has to disclose this honestly โ€” a silent mismatch between preview and export is the fastest way to lose a user's trust.


5. Performance notes from production

  • Don't GPU-filter what a matrix can render. The strategy router sends ~24 color filters through ColorFiltered โ€” effectively free, works on network streams, works everywhere Skia composites. The GPU surface is reserved for local files and shader-only effects.
  • Key the GPU surface; don't mutate it. ValueKey('${clipIndex}_${filterId}') and full recreation beats trying to hot-swap shader configurations on a live controller.
  • Debounce sliders (โ‰ˆ300 ms) โ€” update state immediately for a responsive thumb, re-render the filtered preview lazily.
  • Skip per-filter thumbnail rendering unless you need it. Our filter carousel uses icon tiles instead of 30 filtered video thumbnails; generating and caching real filtered previews per filter per clip is a deceptively large cost on low-end devices for marginal UX gain.
  • Persist sparsely. Intensity is only written when < 1.0; null means "full strength." Tiny choices like this keep per-clip JSON lean when projects have dozens of clips.


Lessons learned

  1. There is no single "filter implementation." Accept that preview and export are different engines; design one canonical parameter map and treat every renderer as a projection of it.
  2. Route by capability. A three-tier strategy (color matrix โ†’ custom painter โ†’ GPU/export-only) gives most filters free real-time preview and saves the expensive path for effects that earn it.
  3. Intensity is the cheapest premium feature you'll ever ship โ€” a matrix lerp in preview, a split/blend in FFmpeg.
  4. Parity is a test surface. Render a frame through each path with the same parameters and compare. The mismatches you'll find (units, gamma vs. gain, hard-coded constants) are exactly the ones users would have found for you.
  5. Be honest in the UI. If a filter only exists at export โ€” or only in preview โ€” label it. Trust survives missing features; it doesn't survive surprises.

The result: a filter system with live preview on everything from a budget Android phone to a desktop build, slider-level adjustments with instant feedback, named presets, and exports that look like what the user saw โ€” built from one parameter map and three carefully reconciled renderers.


Real-Time GPU Video Filters in Flutter: Presets, Adjustments, and Live Preview

One slider, three renderers: how we built Instagram-style video filters with GPU shaders for preview, Skia color matrices for everywhere else, and FFmpeg for export โ€” and kept them all telling the same visual story.


Filters look easy. Video filters aren't.

Applying a sepia tone to an image in Flutter is a one-liner โ€” wrap it in a ColorFiltered widget and you're done. Applying it to a video is a different sport entirely:

  • The preview must run at 30โ€“60 fps on top of a playing video, on whatever device the user owns.
  • The user must be able to drag sliders (brightness, contrast, hue, temperatureโ€ฆ) and see the result live.
  • And the cruel part: when they hit Export, the burned-in MP4 must look like what they previewed โ€” but your preview renderer (Flutter/GPU) and your export renderer (FFmpeg) are completely different engines that have never heard of each other.

This post is about how we built that pipeline in a Flutter video editor: a filter catalog with presets and per-parameter adjustments, a live preview that picks the cheapest renderer that can do the job, and an FFmpeg export path that reproduces the look. The headline lesson up front:

Every filter ends up implemented three times โ€” as a GPU shader configuration, as a Skia 4ร—5 color matrix, and as an FFmpeg filter string โ€” all driven by one shared parameter map. The real engineering is keeping those three reimplementations visually consistent.


The architecture: one parameter map, three renderers

                       โ”Œโ”€โ”€โ”€โ”€โ”€โ”€โ”€โ”€โ”€โ”€โ”€โ”€โ”€โ”€โ”€โ”€โ”€โ”€โ”€โ”€โ”€โ”€โ”€โ”€โ”€โ”€โ”€โ”€โ”
                       โ”‚   shared parameter map     โ”‚
                       โ”‚ {filterId, params, 0โ€“1     โ”‚
                       โ”‚        intensity}          โ”‚
                       โ””โ”€โ”€โ”€โ”€โ”€โ”ฌโ”€โ”€โ”€โ”€โ”€โ”€โ”€โ”ฌโ”€โ”€โ”€โ”€โ”€โ”€โ”€โ”ฌโ”€โ”€โ”€โ”€โ”€โ”€โ”˜
                             โ”‚       โ”‚       โ”‚
              โ”Œโ”€โ”€โ”€โ”€โ”€โ”€โ”€โ”€โ”€โ”€โ”€โ”€โ”€โ”€โ”˜       โ”‚       โ””โ”€โ”€โ”€โ”€โ”€โ”€โ”€โ”€โ”€โ”€โ”€โ”€โ”€โ”€โ”€โ”
              โ–ผ                      โ–ผ                       โ–ผ
   GPU shader preview      Skia ColorFilter.matrix     FFmpeg -vf string
 (flutter_gpu_video_       (primary live preview,      (export โ€” the only
  filters, local clips)     universal fallback)         thing users keep)

The three paths exist because each one wins somewhere:

  1. GPU shaders (flutter_gpu_video_filters) give true shader-quality effects โ€” distortions, blurs, tone mapping โ€” but the package renders into its own surface and works best with local video files.
  2. Skia ColorFilter.matrix โ€” a 4ร—5 color matrix wrapped around the video widget with ColorFiltered โ€” is nearly free, works on any video widget (network streams included), and covers the most-used two dozen filters: brightness, contrast, sepia, grayscale, hue, duotonesโ€ฆ
  3. FFmpeg is the only renderer whose output the user actually keeps. Export re-derives every look as a filter-graph string (eq=, hue=, colorchannelmixer=โ€ฆ).

A small strategy router decides per-filter which preview engine to use:

// Which preview strategy can render this filter?
static FilterStrategy getFilterStrategy(String filterId) {
  if (_colorFilterIds.contains(filterId))         return FilterStrategy.colorFilter;
  if (_customPainterFilterIds.contains(filterId)) return FilterStrategy.customPainter;
  return FilterStrategy.exportOnly;
}

  • colorFilter โ†’ wrap the player in ColorFiltered(colorFilter: getColorFilter(id, params))
  • customPainter โ†’ stack a CustomPainter overlay on the video (vignette, pixelation, halftone โ€” things a color matrix can't express)
  • exportOnly โ†’ show the original video plus a badge telling the user the effect appears in the export

That router is the single most cost-effective decision in the system: it gives ~24 filters genuinely free real-time preview on every device, and reserves the heavyweight machinery for the filters that need it.


1. The filter catalog, presets, and adjustments

Each filter in the catalog is a tiny declarative item โ€” an id, a display name, a category, and (when the GPU path supports it) a factory for the shader configuration:

const GpuVideoFilterItem({
  required this.id,
  required this.name,
  required this.icon,
  required this.category,
  this.createConfiguration, // () => GPUFilterConfiguration, when GPU-capable
});

GPUFilterConfiguration? getConfiguration() => createConfiguration?.call();

Presets are just named parameter bundles pointing at a filter โ€” the "P1โ€“P5" quick looks in the UI:

static List<FilterPreset> get allPresets => [
  const FilterPreset(id: 'P1', name: 'Warm Vintage',
    filterId: 'sepia',     parameters: {'intensity': 0.8}),
  const FilterPreset(id: 'P2', name: 'Classic B&W',
    filterId: 'grayscale', parameters: {'intensity': 1.0}),
  const FilterPreset(id: 'P3', name: 'Vivid Colors',
    filterId: 'vibrance',  parameters: {'vibrance': 0.5}),
  const FilterPreset(id: 'P4', name: 'High Contrast',
    filterId: 'contrast',  parameters: {'contrast': 1.4}),
  const FilterPreset(id: 'P5', name: 'Cinematic',
    filterId: 'vignette',  parameters: {'vignetteStart': 0.3, 'vignetteEnd': 0.75}),
];

Adjustments are typed parameter descriptors with ranges, defaults, and even a gradient hint so each slider can render a meaningful track (blackโ†’white for brightness, a rainbow for hue):

case 'brightness':
  return [const FilterParameter(id: 'brightness', displayName: 'Brightness',
    minValue: -1.0, maxValue: 1.0, defaultValue: 0.0,
    gradientType: FilterParameterGradientType.blackToWhite)];
case 'contrast':
  return [const FilterParameter(id: 'contrast', displayName: 'Contrast',
    minValue: 0.5, maxValue: 2.0, defaultValue: 1.0,
    gradientType: FilterParameterGradientType.grayToWhite)];
case 'hue':
  return [const FilterParameter(id: 'hue', displayName: 'Hue',
    minValue: -180.0, maxValue: 180.0, defaultValue: 0.0, unit: 'ยฐ',
    gradientType: FilterParameterGradientType.rainbow)];

The current slider values live in an immutable state object, seeded from defaults:

factory FilterAdjustmentState.fromDefaults(String filterId, List<FilterParameter> parameters) {
  return FilterAdjustmentState(
    filterId: filterId,
    parameterValues: Map.fromEntries(parameters.map((p) => MapEntry(p.id, p.defaultValue))),
  );
}

And one UX detail that matters more than it looks: slider updates write to state immediately (so the thumb tracks the finger), but the preview re-render is debounced by 300 ms. Without the debounce, dragging a slider rebuilds the filtered video subtree dozens of times per second and the drag stutters; with it, the preview snaps to the final value the moment the finger slows down.

What gets persisted on the clip is deliberately minimal:

class Filters {
  final String? adjust;     // manually chosen filter id, e.g. 'sepia'
  final String? presets;    // preset id, e.g. 'P1'
  final double? intensity;  // 0.0โ€“1.0; null means 1.0 (only saved when < 1.0)
  final Map<String, double>? parameters; // per-filter slider values
}


2. Live preview, path by path

The workhorse: a 4ร—5 color matrix

Most of the catalog is color math, and Skia color matrices do color math for free. The filter manager turns a filter id + parameters into a ColorFilter.matrix:

static ColorFilter getColorFilter(String filterId, [Map<String, double> parameters = const {}]) {
  final matrix = _getColorMatrixWithParams(filterId, parameters);
  return ColorFilter.matrix(matrix);
}

Parameterized filters build their matrices on the fly. Two examples โ€” and note the ร—255, because matrix offsets live in 0โ€“255 color space:

case 'brightness':
  final brightness = (params['brightness'] ?? 0.0) * 255.0;
  return [1,0,0,0,brightness,  0,1,0,0,brightness,
          0,0,1,0,brightness,  0,0,0,1,0];
case 'contrast':
  final contrast = params['contrast'] ?? 1.0;
  final offset = -(0.5 * contrast) + 0.5;
  return [contrast,0,0,0,offset*255,  0,contrast,0,0,offset*255,
          0,0,contrast,0,offset*255,  0,0,0,1,0];

Filter intensity โ€” the global "how much of this look" slider โ€” is implemented as a straight interpolation between the effect matrix and the identity matrix:

final interpolatedMatrix = List<double>.generate(20, (i) {
  return identityMatrix[i] + (effectMatrix[i] - identityMatrix[i]) * intensity;
});

That one-liner gives every color filter a free 0โ€“100% strength control with zero extra shader or pipeline work.

The real GPU path

For local clips, the editor swaps in a true GPU-filtered surface from flutter_gpu_video_filters. The widget is keyed so changing clip or filter tears down and recreates the whole surface (the package's controller doesn't love hot config swaps mid-flight):

return GPUVideoSurfacePreview(
  key: ValueKey(filterKey), // '${clipIndex}_${filterId}' โ€” force full recreation
  configuration: _gpuFilterConfiguration!,
  onViewCreated: (controller, sizeStream) async {
    _gpuPreviewController = controller;
    if (_mainController != null && _isPlaying) {
      _mainController!.pause(); // avoid duplicate playback (and doubled audio!)
    }
    await controller.setVideoSource(FileInputSource(File(clipInfo.assetPath!)));
    if (mounted) setState(() => _isGpuPreviewInitialized = true);
  },
);

The shader configuration is assembled per filter from the package's typed configs, fed by the same parameter map the sliders write into:

case 'brightness':    return GPUBrightnessConfiguration()..brightness = getParam('brightness', 0.0);
case 'contrast':      return GPUContrastConfiguration()..contrast   = getParam('contrast', 1.0);
case 'saturation':    return GPUSaturationConfiguration()..saturation = getParam('saturation', 1.0);
case 'hue':           return GPUHueConfiguration()..hue = getParam('hue', 0.0);
case 'white_balance': return GPUWhiteBalanceConfiguration()..temperature = getParam('temperature', 5000.0);

Two lifecycle lessons paid for in debugging hours:

  • Pause the underlying player before the GPU surface starts. The GPU preview plays the video itself; forget the pause and you get two decoders playing the same clip โ€” including doubled, slightly offset audio.
  • Dispose properly on filter change: disconnect() the old configuration, create new preview params, connect() the new one, and dispose() the controller (plus cancel the size-stream subscription) when leaving the screen.

The desktop curveball

On desktop, the video backend renders into an external texture that bypasses Skia's layer compositing โ€” so wrapping the player in ColorFiltered silently does nothing; there's no Skia layer to transform. The workaround is to force rasterization of the underlying layer (e.g. an interposed BackdropFilter over a SizedBox.expand) so the color matrix has actual pixels to operate on. If your filters "work on Android but not on desktop," this is almost certainly why.


3. Export: rebuilding the look in FFmpeg

The preview is rented; the export is owned. At export time, the saved Filters model is resolved (a manually chosen filter takes precedence over a preset; preset ids are mapped back to their filter + parameters) and translated into an FFmpeg filter string:

switch (normalizedId) {
  case 'grayscale':  return 'hue=s=0';
  case 'sepia':      return 'colorchannelmixer=.393:.769:.189:0:.349:.686:.168:0:.272:.534:.131';
  case 'invert':     return 'negate';
  case 'brightness':
    final b = params?['brightness'] ?? 0.3;  return 'eq=brightness=${b.toStringAsFixed(3)}';
  case 'contrast':
    final c = params?['contrast'] ?? 1.5;    return 'eq=contrast=${c.toStringAsFixed(3)}';
  case 'saturation':
    final s = params?['saturation'] ?? 1.5;  return 'eq=saturation=${s.toStringAsFixed(3)}';
  case 'exposure':
    final e = params?['exposure'] ?? 0.4;    // FFmpeg eq has no exposure โ€” fake it with gamma
    final gamma = e >= 0 ? (1.0 - e * 0.5).clamp(0.1, 10.0)
                         : (1.0 / (1.0 + (-e) * 0.5)).clamp(0.1, 10.0);
    return 'eq=gamma=${gamma.toStringAsFixed(3)}';
  case 'hue':
    final h = params?['hue'] ?? 90.0;        return 'hue=h=${h.toStringAsFixed(1)}';
  case 'gaussian_blur':
    final sigma = (params?['sigma'] ?? 5.0).clamp(0.1, 50.0);
    return 'gblur=sigma=${sigma.toStringAsFixed(1)}';
  case 'vignette':   return "vignette='PI/4'";
  // swirl / bulge / toon / kuwahara / crosshatch ... โ†’ return '' (preview-only)
}

Intensity at export: the split/blend trick

Remember the preview implements intensity by lerping the color matrix toward identity. FFmpeg has no "matrix lerp" โ€” but it has stream compositing. So a partial-intensity export splits the video, filters one branch, and blends it back over the original at the saved opacity:

if (intensity >= 0.99) {
  command = ['-i','"$videoPath"','-vf', filterCommand,
    '-c:v','libx264','-preset',options.preset,'-crf','${options.crf}',
    '-c:a','copy','-movflags','+faststart','-y','"$outputPath"'].join(' ');
} else {
  final opacity = intensity.toStringAsFixed(2);
  command = ['-i','"$videoPath"','-filter_complex',
    '[0:v]split[orig][tofilter];'
    '[tofilter]$filterCommand[filtered];'
    '[orig][filtered]blend=all_mode=normal:all_opacity=$opacity[out]',
    '-map','[out]','-c:v','libx264','-preset',options.preset,'-crf','${options.crf}',
    '-c:a','copy','-movflags','+faststart','-y','"$outputPath"'].join(' ');
}

It's not mathematically identical to the matrix lerp, but perceptually it lands close โ€” and it works for any filter string, not just color matrices.

The filter pass is one isolated re-encode in a longer export chain (canvas-fit โ†’ filter โ†’ effects โ†’ overlays โ†’ audio mix โ†’ concat), with -c:a copy keeping audio untouched until the dedicated mixing stage, and the source duration probed at every stage to catch drift early.


4. The parity table: where three renderers agree โ€” and where they don't

This is the part nobody writes about. One stored value, three interpretations:

ParameterSlider rangeGPU shaderSkia matrixFFmpeg export
brightnessโˆ’1 โ€ฆ 1native โˆ’1โ€ฆ1offset = v ร— 255eq=brightness=v
contrast0.5 โ€ฆ 2nativediagonal v, offset re-centeredeq=contrast=v
saturation0 โ€ฆ 2nativeRec.709 luma-weighted blendeq=saturation=v
exposureโˆ’1 โ€ฆ 1linear gainlinear gainfaked via gamma curve
hueโˆ’180ยฐ โ€ฆ 180ยฐnativefull cos/sin rotation matrixhue=h=v
sepiaintensityshadermatrix .393/.769/.189โ€ฆcolorchannelmixer โ€” same coefficients, exact parity
intensity0 โ€ฆ 1preset multiplierlerp matrix โ†’ identitysplit + blend=all_opacity

Hard-won parity lessons:

  • Pick one filter as your ground truth. Sepia achieves exact parity because the identical 3ร—3 coefficients appear in both the Skia matrix and FFmpeg's colorchannelmixer. Build that one first and use it to validate your pipeline end to end.
  • Beware unit mismatches. The Skia brightness offset is in 0โ€“255 space while the GPU shader works in โˆ’1โ€ฆ1 โ€” the same slider value is dramatically more aggressive on one path unless you normalize deliberately.
  • Some mappings are approximations, and that's a decision. FFmpeg's eq has no exposure control, so export approximates exposure with an inverse gamma curve. Linear-gain preview vs. gamma-curve export diverge in the shadows. Acceptable? Maybe โ€” but decide it consciously and write it down.
  • Watch for parameters that silently degrade. In an early version, the white-balance Kelvin slider drove the GPU preview beautifully โ€” while the export emitted a hard-coded color temperature. The user dragged a slider that did nothing to their final video. Audit every parameter across all three paths.
  • Preview-only filters must say so. Distortion and stylize effects (swirl, bulge, toon, kuwaharaโ€ฆ) exist only as GPU shaders; their export translation returns an empty string and the pipeline passes the original video through. The UI has to disclose this honestly โ€” a silent mismatch between preview and export is the fastest way to lose a user's trust.


5. Performance notes from production

  • Don't GPU-filter what a matrix can render. The strategy router sends ~24 color filters through ColorFiltered โ€” effectively free, works on network streams, works everywhere Skia composites. The GPU surface is reserved for local files and shader-only effects.
  • Key the GPU surface; don't mutate it. ValueKey('${clipIndex}_${filterId}') and full recreation beats trying to hot-swap shader configurations on a live controller.
  • Debounce sliders (โ‰ˆ300 ms) โ€” update state immediately for a responsive thumb, re-render the filtered preview lazily.
  • Skip per-filter thumbnail rendering unless you need it. Our filter carousel uses icon tiles instead of 30 filtered video thumbnails; generating and caching real filtered previews per filter per clip is a deceptively large cost on low-end devices for marginal UX gain.
  • Persist sparsely. Intensity is only written when < 1.0; null means "full strength." Tiny choices like this keep per-clip JSON lean when projects have dozens of clips.


Lessons learned

  1. There is no single "filter implementation." Accept that preview and export are different engines; design one canonical parameter map and treat every renderer as a projection of it.
  2. Route by capability. A three-tier strategy (color matrix โ†’ custom painter โ†’ GPU/export-only) gives most filters free real-time preview and saves the expensive path for effects that earn it.
  3. Intensity is the cheapest premium feature you'll ever ship โ€” a matrix lerp in preview, a split/blend in FFmpeg.
  4. Parity is a test surface. Render a frame through each path with the same parameters and compare. The mismatches you'll find (units, gamma vs. gain, hard-coded constants) are exactly the ones users would have found for you.
  5. Be honest in the UI. If a filter only exists at export โ€” or only in preview โ€” label it. Trust survives missing features; it doesn't survive surprises.

The result: a filter system with live preview on everything from a budget Android phone to a desktop build, slider-level adjustments with instant feedback, named presets, and exports that look like what the user saw โ€” built from one parameter map and three carefully reconciled renderers.


Real-Time GPU Video Filters in Flutter: Presets, Adjustments, and Live Preview

One slider, three renderers: how we built Instagram-style video filters with GPU shaders for preview, Skia color matrices for everywhere else, and FFmpeg for export โ€” and kept them all telling the same visual story.


Filters look easy. Video filters aren't.

Applying a sepia tone to an image in Flutter is a one-liner โ€” wrap it in a ColorFiltered widget and you're done. Applying it to a video is a different sport entirely:

  • The preview must run at 30โ€“60 fps on top of a playing video, on whatever device the user owns.
  • The user must be able to drag sliders (brightness, contrast, hue, temperatureโ€ฆ) and see the result live.
  • And the cruel part: when they hit Export, the burned-in MP4 must look like what they previewed โ€” but your preview renderer (Flutter/GPU) and your export renderer (FFmpeg) are completely different engines that have never heard of each other.

This post is about how we built that pipeline in a Flutter video editor: a filter catalog with presets and per-parameter adjustments, a live preview that picks the cheapest renderer that can do the job, and an FFmpeg export path that reproduces the look. The headline lesson up front:

Every filter ends up implemented three times โ€” as a GPU shader configuration, as a Skia 4ร—5 color matrix, and as an FFmpeg filter string โ€” all driven by one shared parameter map. The real engineering is keeping those three reimplementations visually consistent.


The architecture: one parameter map, three renderers

                       โ”Œโ”€โ”€โ”€โ”€โ”€โ”€โ”€โ”€โ”€โ”€โ”€โ”€โ”€โ”€โ”€โ”€โ”€โ”€โ”€โ”€โ”€โ”€โ”€โ”€โ”€โ”€โ”€โ”€โ”
                       โ”‚   shared parameter map     โ”‚
                       โ”‚ {filterId, params, 0โ€“1     โ”‚
                       โ”‚        intensity}          โ”‚
                       โ””โ”€โ”€โ”€โ”€โ”€โ”ฌโ”€โ”€โ”€โ”€โ”€โ”€โ”€โ”ฌโ”€โ”€โ”€โ”€โ”€โ”€โ”€โ”ฌโ”€โ”€โ”€โ”€โ”€โ”€โ”˜
                             โ”‚       โ”‚       โ”‚
              โ”Œโ”€โ”€โ”€โ”€โ”€โ”€โ”€โ”€โ”€โ”€โ”€โ”€โ”€โ”€โ”˜       โ”‚       โ””โ”€โ”€โ”€โ”€โ”€โ”€โ”€โ”€โ”€โ”€โ”€โ”€โ”€โ”€โ”€โ”
              โ–ผ                      โ–ผ                       โ–ผ
   GPU shader preview      Skia ColorFilter.matrix     FFmpeg -vf string
 (flutter_gpu_video_       (primary live preview,      (export โ€” the only
  filters, local clips)     universal fallback)         thing users keep)

The three paths exist because each one wins somewhere:

  1. GPU shaders (flutter_gpu_video_filters) give true shader-quality effects โ€” distortions, blurs, tone mapping โ€” but the package renders into its own surface and works best with local video files.
  2. Skia ColorFilter.matrix โ€” a 4ร—5 color matrix wrapped around the video widget with ColorFiltered โ€” is nearly free, works on any video widget (network streams included), and covers the most-used two dozen filters: brightness, contrast, sepia, grayscale, hue, duotonesโ€ฆ
  3. FFmpeg is the only renderer whose output the user actually keeps. Export re-derives every look as a filter-graph string (eq=, hue=, colorchannelmixer=โ€ฆ).

A small strategy router decides per-filter which preview engine to use:

// Which preview strategy can render this filter?
static FilterStrategy getFilterStrategy(String filterId) {
  if (_colorFilterIds.contains(filterId))         return FilterStrategy.colorFilter;
  if (_customPainterFilterIds.contains(filterId)) return FilterStrategy.customPainter;
  return FilterStrategy.exportOnly;
}

  • colorFilter โ†’ wrap the player in ColorFiltered(colorFilter: getColorFilter(id, params))
  • customPainter โ†’ stack a CustomPainter overlay on the video (vignette, pixelation, halftone โ€” things a color matrix can't express)
  • exportOnly โ†’ show the original video plus a badge telling the user the effect appears in the export

That router is the single most cost-effective decision in the system: it gives ~24 filters genuinely free real-time preview on every device, and reserves the heavyweight machinery for the filters that need it.


1. The filter catalog, presets, and adjustments

Each filter in the catalog is a tiny declarative item โ€” an id, a display name, a category, and (when the GPU path supports it) a factory for the shader configuration:

const GpuVideoFilterItem({
  required this.id,
  required this.name,
  required this.icon,
  required this.category,
  this.createConfiguration, // () => GPUFilterConfiguration, when GPU-capable
});

GPUFilterConfiguration? getConfiguration() => createConfiguration?.call();

Presets are just named parameter bundles pointing at a filter โ€” the "P1โ€“P5" quick looks in the UI:

static List<FilterPreset> get allPresets => [
  const FilterPreset(id: 'P1', name: 'Warm Vintage',
    filterId: 'sepia',     parameters: {'intensity': 0.8}),
  const FilterPreset(id: 'P2', name: 'Classic B&W',
    filterId: 'grayscale', parameters: {'intensity': 1.0}),
  const FilterPreset(id: 'P3', name: 'Vivid Colors',
    filterId: 'vibrance',  parameters: {'vibrance': 0.5}),
  const FilterPreset(id: 'P4', name: 'High Contrast',
    filterId: 'contrast',  parameters: {'contrast': 1.4}),
  const FilterPreset(id: 'P5', name: 'Cinematic',
    filterId: 'vignette',  parameters: {'vignetteStart': 0.3, 'vignetteEnd': 0.75}),
];

Adjustments are typed parameter descriptors with ranges, defaults, and even a gradient hint so each slider can render a meaningful track (blackโ†’white for brightness, a rainbow for hue):

case 'brightness':
  return [const FilterParameter(id: 'brightness', displayName: 'Brightness',
    minValue: -1.0, maxValue: 1.0, defaultValue: 0.0,
    gradientType: FilterParameterGradientType.blackToWhite)];
case 'contrast':
  return [const FilterParameter(id: 'contrast', displayName: 'Contrast',
    minValue: 0.5, maxValue: 2.0, defaultValue: 1.0,
    gradientType: FilterParameterGradientType.grayToWhite)];
case 'hue':
  return [const FilterParameter(id: 'hue', displayName: 'Hue',
    minValue: -180.0, maxValue: 180.0, defaultValue: 0.0, unit: 'ยฐ',
    gradientType: FilterParameterGradientType.rainbow)];

The current slider values live in an immutable state object, seeded from defaults:

factory FilterAdjustmentState.fromDefaults(String filterId, List<FilterParameter> parameters) {
  return FilterAdjustmentState(
    filterId: filterId,
    parameterValues: Map.fromEntries(parameters.map((p) => MapEntry(p.id, p.defaultValue))),
  );
}

And one UX detail that matters more than it looks: slider updates write to state immediately (so the thumb tracks the finger), but the preview re-render is debounced by 300 ms. Without the debounce, dragging a slider rebuilds the filtered video subtree dozens of times per second and the drag stutters; with it, the preview snaps to the final value the moment the finger slows down.

What gets persisted on the clip is deliberately minimal:

class Filters {
  final String? adjust;     // manually chosen filter id, e.g. 'sepia'
  final String? presets;    // preset id, e.g. 'P1'
  final double? intensity;  // 0.0โ€“1.0; null means 1.0 (only saved when < 1.0)
  final Map<String, double>? parameters; // per-filter slider values
}


2. Live preview, path by path

The workhorse: a 4ร—5 color matrix

Most of the catalog is color math, and Skia color matrices do color math for free. The filter manager turns a filter id + parameters into a ColorFilter.matrix:

static ColorFilter getColorFilter(String filterId, [Map<String, double> parameters = const {}]) {
  final matrix = _getColorMatrixWithParams(filterId, parameters);
  return ColorFilter.matrix(matrix);
}

Parameterized filters build their matrices on the fly. Two examples โ€” and note the ร—255, because matrix offsets live in 0โ€“255 color space:

case 'brightness':
  final brightness = (params['brightness'] ?? 0.0) * 255.0;
  return [1,0,0,0,brightness,  0,1,0,0,brightness,
          0,0,1,0,brightness,  0,0,0,1,0];
case 'contrast':
  final contrast = params['contrast'] ?? 1.0;
  final offset = -(0.5 * contrast) + 0.5;
  return [contrast,0,0,0,offset*255,  0,contrast,0,0,offset*255,
          0,0,contrast,0,offset*255,  0,0,0,1,0];

Filter intensity โ€” the global "how much of this look" slider โ€” is implemented as a straight interpolation between the effect matrix and the identity matrix:

final interpolatedMatrix = List<double>.generate(20, (i) {
  return identityMatrix[i] + (effectMatrix[i] - identityMatrix[i]) * intensity;
});

That one-liner gives every color filter a free 0โ€“100% strength control with zero extra shader or pipeline work.

The real GPU path

For local clips, the editor swaps in a true GPU-filtered surface from flutter_gpu_video_filters. The widget is keyed so changing clip or filter tears down and recreates the whole surface (the package's controller doesn't love hot config swaps mid-flight):

return GPUVideoSurfacePreview(
  key: ValueKey(filterKey), // '${clipIndex}_${filterId}' โ€” force full recreation
  configuration: _gpuFilterConfiguration!,
  onViewCreated: (controller, sizeStream) async {
    _gpuPreviewController = controller;
    if (_mainController != null && _isPlaying) {
      _mainController!.pause(); // avoid duplicate playback (and doubled audio!)
    }
    await controller.setVideoSource(FileInputSource(File(clipInfo.assetPath!)));
    if (mounted) setState(() => _isGpuPreviewInitialized = true);
  },
);

The shader configuration is assembled per filter from the package's typed configs, fed by the same parameter map the sliders write into:

case 'brightness':    return GPUBrightnessConfiguration()..brightness = getParam('brightness', 0.0);
case 'contrast':      return GPUContrastConfiguration()..contrast   = getParam('contrast', 1.0);
case 'saturation':    return GPUSaturationConfiguration()..saturation = getParam('saturation', 1.0);
case 'hue':           return GPUHueConfiguration()..hue = getParam('hue', 0.0);
case 'white_balance': return GPUWhiteBalanceConfiguration()..temperature = getParam('temperature', 5000.0);

Two lifecycle lessons paid for in debugging hours:

  • Pause the underlying player before the GPU surface starts. The GPU preview plays the video itself; forget the pause and you get two decoders playing the same clip โ€” including doubled, slightly offset audio.
  • Dispose properly on filter change: disconnect() the old configuration, create new preview params, connect() the new one, and dispose() the controller (plus cancel the size-stream subscription) when leaving the screen.

The desktop curveball

On desktop, the video backend renders into an external texture that bypasses Skia's layer compositing โ€” so wrapping the player in ColorFiltered silently does nothing; there's no Skia layer to transform. The workaround is to force rasterization of the underlying layer (e.g. an interposed BackdropFilter over a SizedBox.expand) so the color matrix has actual pixels to operate on. If your filters "work on Android but not on desktop," this is almost certainly why.


3. Export: rebuilding the look in FFmpeg

The preview is rented; the export is owned. At export time, the saved Filters model is resolved (a manually chosen filter takes precedence over a preset; preset ids are mapped back to their filter + parameters) and translated into an FFmpeg filter string:

switch (normalizedId) {
  case 'grayscale':  return 'hue=s=0';
  case 'sepia':      return 'colorchannelmixer=.393:.769:.189:0:.349:.686:.168:0:.272:.534:.131';
  case 'invert':     return 'negate';
  case 'brightness':
    final b = params?['brightness'] ?? 0.3;  return 'eq=brightness=${b.toStringAsFixed(3)}';
  case 'contrast':
    final c = params?['contrast'] ?? 1.5;    return 'eq=contrast=${c.toStringAsFixed(3)}';
  case 'saturation':
    final s = params?['saturation'] ?? 1.5;  return 'eq=saturation=${s.toStringAsFixed(3)}';
  case 'exposure':
    final e = params?['exposure'] ?? 0.4;    // FFmpeg eq has no exposure โ€” fake it with gamma
    final gamma = e >= 0 ? (1.0 - e * 0.5).clamp(0.1, 10.0)
                         : (1.0 / (1.0 + (-e) * 0.5)).clamp(0.1, 10.0);
    return 'eq=gamma=${gamma.toStringAsFixed(3)}';
  case 'hue':
    final h = params?['hue'] ?? 90.0;        return 'hue=h=${h.toStringAsFixed(1)}';
  case 'gaussian_blur':
    final sigma = (params?['sigma'] ?? 5.0).clamp(0.1, 50.0);
    return 'gblur=sigma=${sigma.toStringAsFixed(1)}';
  case 'vignette':   return "vignette='PI/4'";
  // swirl / bulge / toon / kuwahara / crosshatch ... โ†’ return '' (preview-only)
}

Intensity at export: the split/blend trick

Remember the preview implements intensity by lerping the color matrix toward identity. FFmpeg has no "matrix lerp" โ€” but it has stream compositing. So a partial-intensity export splits the video, filters one branch, and blends it back over the original at the saved opacity:

if (intensity >= 0.99) {
  command = ['-i','"$videoPath"','-vf', filterCommand,
    '-c:v','libx264','-preset',options.preset,'-crf','${options.crf}',
    '-c:a','copy','-movflags','+faststart','-y','"$outputPath"'].join(' ');
} else {
  final opacity = intensity.toStringAsFixed(2);
  command = ['-i','"$videoPath"','-filter_complex',
    '[0:v]split[orig][tofilter];'
    '[tofilter]$filterCommand[filtered];'
    '[orig][filtered]blend=all_mode=normal:all_opacity=$opacity[out]',
    '-map','[out]','-c:v','libx264','-preset',options.preset,'-crf','${options.crf}',
    '-c:a','copy','-movflags','+faststart','-y','"$outputPath"'].join(' ');
}

It's not mathematically identical to the matrix lerp, but perceptually it lands close โ€” and it works for any filter string, not just color matrices.

The filter pass is one isolated re-encode in a longer export chain (canvas-fit โ†’ filter โ†’ effects โ†’ overlays โ†’ audio mix โ†’ concat), with -c:a copy keeping audio untouched until the dedicated mixing stage, and the source duration probed at every stage to catch drift early.


4. The parity table: where three renderers agree โ€” and where they don't

This is the part nobody writes about. One stored value, three interpretations:

ParameterSlider rangeGPU shaderSkia matrixFFmpeg export
brightnessโˆ’1 โ€ฆ 1native โˆ’1โ€ฆ1offset = v ร— 255eq=brightness=v
contrast0.5 โ€ฆ 2nativediagonal v, offset re-centeredeq=contrast=v
saturation0 โ€ฆ 2nativeRec.709 luma-weighted blendeq=saturation=v
exposureโˆ’1 โ€ฆ 1linear gainlinear gainfaked via gamma curve
hueโˆ’180ยฐ โ€ฆ 180ยฐnativefull cos/sin rotation matrixhue=h=v
sepiaintensityshadermatrix .393/.769/.189โ€ฆcolorchannelmixer โ€” same coefficients, exact parity
intensity0 โ€ฆ 1preset multiplierlerp matrix โ†’ identitysplit + blend=all_opacity

Hard-won parity lessons:

  • Pick one filter as your ground truth. Sepia achieves exact parity because the identical 3ร—3 coefficients appear in both the Skia matrix and FFmpeg's colorchannelmixer. Build that one first and use it to validate your pipeline end to end.
  • Beware unit mismatches. The Skia brightness offset is in 0โ€“255 space while the GPU shader works in โˆ’1โ€ฆ1 โ€” the same slider value is dramatically more aggressive on one path unless you normalize deliberately.
  • Some mappings are approximations, and that's a decision. FFmpeg's eq has no exposure control, so export approximates exposure with an inverse gamma curve. Linear-gain preview vs. gamma-curve export diverge in the shadows. Acceptable? Maybe โ€” but decide it consciously and write it down.
  • Watch for parameters that silently degrade. In an early version, the white-balance Kelvin slider drove the GPU preview beautifully โ€” while the export emitted a hard-coded color temperature. The user dragged a slider that did nothing to their final video. Audit every parameter across all three paths.
  • Preview-only filters must say so. Distortion and stylize effects (swirl, bulge, toon, kuwaharaโ€ฆ) exist only as GPU shaders; their export translation returns an empty string and the pipeline passes the original video through. The UI has to disclose this honestly โ€” a silent mismatch between preview and export is the fastest way to lose a user's trust.


5. Performance notes from production

  • Don't GPU-filter what a matrix can render. The strategy router sends ~24 color filters through ColorFiltered โ€” effectively free, works on network streams, works everywhere Skia composites. The GPU surface is reserved for local files and shader-only effects.
  • Key the GPU surface; don't mutate it. ValueKey('${clipIndex}_${filterId}') and full recreation beats trying to hot-swap shader configurations on a live controller.
  • Debounce sliders (โ‰ˆ300 ms) โ€” update state immediately for a responsive thumb, re-render the filtered preview lazily.
  • Skip per-filter thumbnail rendering unless you need it. Our filter carousel uses icon tiles instead of 30 filtered video thumbnails; generating and caching real filtered previews per filter per clip is a deceptively large cost on low-end devices for marginal UX gain.
  • Persist sparsely. Intensity is only written when < 1.0; null means "full strength." Tiny choices like this keep per-clip JSON lean when projects have dozens of clips.


Lessons learned

  1. There is no single "filter implementation." Accept that preview and export are different engines; design one canonical parameter map and treat every renderer as a projection of it.
  2. Route by capability. A three-tier strategy (color matrix โ†’ custom painter โ†’ GPU/export-only) gives most filters free real-time preview and saves the expensive path for effects that earn it.
  3. Intensity is the cheapest premium feature you'll ever ship โ€” a matrix lerp in preview, a split/blend in FFmpeg.
  4. Parity is a test surface. Render a frame through each path with the same parameters and compare. The mismatches you'll find (units, gamma vs. gain, hard-coded constants) are exactly the ones users would have found for you.
  5. Be honest in the UI. If a filter only exists at export โ€” or only in preview โ€” label it. Trust survives missing features; it doesn't survive surprises.

The result: a filter system with live preview on everything from a budget Android phone to a desktop build, slider-level adjustments with instant feedback, named presets, and exports that look like what the user saw โ€” built from one parameter map and three carefully reconciled renderers.


Tentang Penulis

Manya Garg

AI & Cloud Solutions Expert at MicrocosmWorks

Building innovative AI-powered solutions and helping businesses transform through cutting-edge technology.

Ingin mempelajari lebih lanjut?

Hubungi kami untuk mendiskusikan bagaimana kami dapat membantu mengimplementasikan solusi ini untuk bisnis Anda.

Hubungi Kami

Comments (0)

Share your thoughts and join the conversation

Leave a Comment

Your email will not be published

No comments yet

Be the first to share your thoughts!