
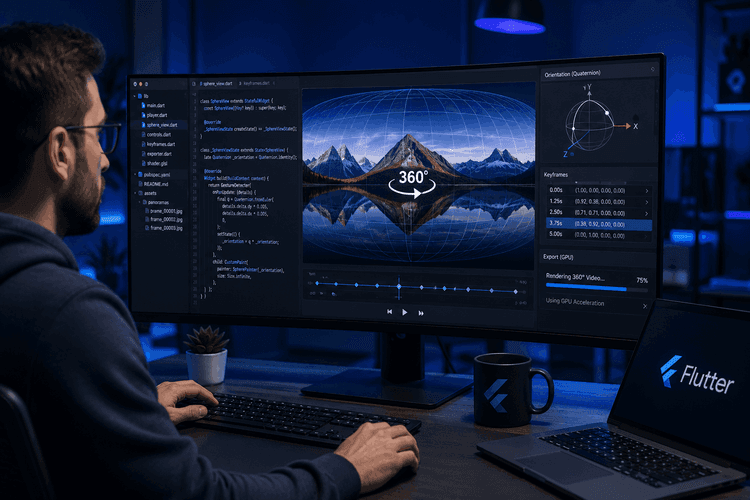
Flutter에서 360° Video 리프레이밍: Spherical Projection, Quaternion Keyframes 및 GPU Export
가공되지 않은 equirectangular 360° footage를 Flutter 앱 내부에서 전적으로 부드럽고 프레임화된 평면 영상으로 변환한 방법.
아무도 경고하지 않는 문제
일반 영상은 카메라가 가리키는 프레임이라는 한 가지 명확한 것을 보여줍니다. 360° 영상은 그런 것이 없습니다. 카메라는 모든 것을 기록했습니다 — X축이 경도이고 Y축이 위도인 평평한 equirectangular 직사각형(2:1 이미지)으로 저장된 전체 픽셀 구체입니다. 이 footage를 Instagram, YouTube 또는 휴대폰 화면에 올리기 전에, 카메라가 의도적으로 대답하기를 거부했던 질문에 누군가 답해야 합니다:
시청자는 어디를, 언제 봐야 할까요?
"Reframing"은 가상 카메라를 시간의 흐름에 따라 구체 안으로 날려 보내고 — 팬, 틸트, 줌 — 일반적인 평면 16:9 (또는 9:16, 또는 2.35:1) 영상을 렌더링하는 행위입니다. 이것이 GoPro Player, Insta360 Studio, 그리고 Adobe Premiere의 GoPro VR Reframe 플러그인이 기반으로 하는 기능입니다.
우리는 이를 전적으로 Flutter로 구축했습니다. 이 게시물은 정말 어려웠던 부분들에 대한 설명입니다: projection math, gimbal-lock-free interpolation, ±180° seam, 그리고 실제 Android decoders를 견뎌야 하는 GPU export pipeline입니다.
종단 간 흐름:
360 영상 캡처/가져오기
→ 경량 미리보기 proxy 트랜스코딩
→ 사용자가 피사체를 탭 / 그리기 / 자동 감지
→ 객체 추적으로 경로 생성
→ keyframes 생성 + 부드럽게 처리
→ SLERP로 프레임별 카메라 방향 보간 (실시간 미리보기)
→ 평면 영상으로 네이티브 GPU export
→ FFmpeg 후처리 (moov atom + A/V sync 수정)
아키텍처 요약
우리는 수학이 Flutter와 독립적으로 테스트 가능하도록 시스템을 세 개의 깔끔한 계층으로 유지했습니다:
| 계층 | 위치 | 책임 |
|---|---|---|
| 모델 | lib/data/models/reframe/ | SphericalCoordinates/Quaternion, CameraOrientation/MotionConstraints, ReframeKeyframe, ReframeProject |
| 서비스 | lib/services/reframe/ | SphericalProjection (ray casting), CoordinateConverter, KeyframeInterpolator/Generator/Smoother, ReframeExportService |
| 프레젠테이션 | lib/presentation/.../reframe/ | Riverpod ReframeNotifier, the native OpenGL Spherical360Player, bbox-drawing overlay, keyframe timeline |
황금률: 모든 삼각법은 Flutter import 없이 순수한 Dart로 작성되었습니다. 이는 모든 projection 및 interpolation 함수가 widget tree 없이 unit-testable하며, 동일한 math가 실시간 미리보기와 export를 모두 구동한다는 것을 의미합니다.
1. 핵심: equirectangular ⟷ spherical
모든 것은 하나의 매핑에서 시작합니다. equirectangular 프레임은 다음과 같은 직사각형입니다:
- X (0 → 너비)는 경도(yaw)를 -180°에서 +180°까지 스윕합니다.
- Y (0 → 높이)는 위도(pitch)를 +90° (상단/천정)에서 -90° (하단/천저)까지 스윕합니다.
SphericalCoordinates는 의도적으로 작게 설계되었습니다 — yaw와 pitch만 포함합니다. Roll, FOV 및 zoom은 방향이 아닌 카메라에 속합니다. 전체 기능의 기반이 되는 변환은 다음과 같습니다:
factory SphericalCoordinates.fromEquirectangular({
required double x, required double y,
required double videoWidth, required double videoHeight,
}) {
final normalizedX = x / videoWidth;
final normalizedY = y / videoHeight;
// X maps to yaw: 0->-180°, 0.5->0°, 1.0->180°
final yaw = (normalizedX - 0.5) * 360.0;
// Y maps to pitch: 0->90° (top), 0.5->0° (horizon), 1.0->-90° (bottom)
final pitch = (0.5 - normalizedY) * 180.0;
return SphericalCoordinates(
yaw: yaw.clamp(-180.0, 180.0),
pitch: pitch.clamp(-90.0, 90.0),
);
}
역변환은 거울 이미지와 같습니다 (normalizedX = yaw/360 + 0.5). 우리는 이를 사용하여 추적된 bounding box를 플레이어 위에 지속적으로 다시 그립니다.
"보이는 것을 탭하세요" — 원근법 Ray Casting
사용자는 equirectangular 직사각형과 상호작용하지 않습니다. 그들은 렌더링된 원근 뷰와 상호작용합니다. 따라서 사용자가 플레이어의 한 지점을 탭하면, 가상 핀홀 카메라를 통해 광선을 투사하여 구체에서 어느 방향을 맞췄는지 찾아야 합니다. 이것이 SphericalProjection.screenToSpherical입니다:
final ndcX = (2.0 * screenPoint.dx / playerSize.width) - 1.0;
final ndcY = 1.0 - (2.0 * screenPoint.dy / playerSize.height);
final aspectRatio = playerSize.width / playerSize.height;
final tanHalfFov = math.tan(cameraFov * math.pi / 360.0); // half-angle
double rayX = ndcX * aspectRatio * tanHalfFov;
double rayY = ndcY * tanHalfFov;
double rayZ = 1.0;
// ...normalize, rotate the ray by pitch (around X) then yaw (around Y)...
final sphericalYaw = math.atan2(finalRayX, finalRayZ) * 180.0 / math.pi;
final sphericalPitch = math.asin(finalRayY.clamp(-1.0, 1.0)) * 180.0 / math.pi;
asin 전에 사용된 .clamp(-1.0, 1.0)은 과하게 보일 수 있지만, 부동 소수점 오차로 인해 1.0000001이 전달될 수 있으며 asin은 NaN을 반환합니다 — 그리고 단 하나의 NaN은 모든 다운스트림 프레임을 오염시킵니다. 역삼각함수 주변의 방어적 clamping은 이 코드베이스에서 반복되는 주제입니다.
2. 부드러운 카메라 움직임: Quaternion, Euler angle 아님
가장 간단한 접근 방식은 각 keyframe에 yaw/pitch를 저장하고 숫자를 선형 보간하는 것입니다. 결과는 끔찍합니다. Euler angle을 보간하면 gimbal lock, 비균일 각속도, 그리고 극 근처에서 보기 흉한 급변 현상이 발생합니다.
우리는 SLERP (spherical linear interpolation)를 사용하여 방향을 Quaternion으로 보간합니다. 각 방향은 ZYX Euler convention을 통해 Quaternion으로 변환됩니다:
Quaternion toQuaternion() {
final yawRad = yaw * math.pi / 180.0;
final pitchRad = pitch * math.pi / 180.0;
final cy = math.cos(yawRad * 0.5); final sy = math.sin(yawRad * 0.5);
final cp = math.cos(pitchRad * 0.5); final sp = math.sin(pitchRad * 0.5);
return Quaternion(w: cy * cp, x: cy * sp, y: sy * cp, z: -sy * sp);
}
그리고 SLERP 자체는 모든 구현에 필요한 두 가지 상용 등급 안전 장치를 갖추고 있습니다:
static Quaternion slerp(Quaternion a, Quaternion b, double t) {
a = a.normalize(); b = b.normalize();
var dotProduct = a.dot(b);
if (dotProduct < 0.0) { b = -b; dotProduct = -dotProduct; } // take the shortest hemisphere
if (dotProduct > 0.9995) { // near-parallel -> fall back to LERP
return Quaternion(w: a.w + t*(b.w-a.w),
y: a.y + t*(b.y-a.y), z: a.z + t*(b.z-a.z)).normalize();
}
final theta0 = math.acos(dotProduct);
final theta = theta0 * t;
final sinTheta = math.sin(theta);
final sinTheta0 = math.sin(theta0);
final s0 = math.cos(theta) - dotProduct * sinTheta / sinTheta0;
final s1 = sinTheta / sinTheta0;
return Quaternion(w: s0*a.w + s1*b.w, /* ...*/).normalize();
}
두 가지 필수적인 세부 사항:
- 최단 반구 — q와 -q는 동일한 방향을 나타냅니다. dot product가 음수이면, 한 입력을 부정하거나 카메라가 구체를 멀리 돌아가는 경로를 택하게 됩니다.
- 거의 평행한 LERP 대체 — 두 keyframe이 거의 동일할 때, sinTheta0 → 0이 되고 거의 0으로 나누게 됩니다. dot > 0.9995일 때 일반 LERP로 대체하면 오류를 방지할 수 있습니다.
미묘하지만 중요한 설계 결정: 우리는 방향은 SLERP로 처리하지만, FOV/zoom은 LERP로, roll은 angle-LERP로 처리합니다. 구형 보간은 방향에 적합한 도구이며; zoom은 단순한 스칼라 값이므로 선형적으로 움직여야 합니다:
final qInterp = Quaternion.slerp(from.direction.toQuaternion(), to.direction.toQuaternion(), t);
final interpDirection = SphericalCoordinates.fromQuaternion(qInterp).normalize();
final interpFov = _lerp(from.fov, to.fov, t);
final interpRoll = _lerpAngle(from.roll, to.roll, t); // wraps across ±180
final interpZoom = _lerp(from.zoom, to.zoom, t);
💡 Quaternion을 yaw/pitch로 다시 변환할 때, 우리는 "수치적 안정성을 위해 (asin domain 문제를 피하기 위해)" asin 대신 atan2를 사용합니다. SLERP 후 Quaternion은 아주 약간 denormalized될 수 있으며, asin이 NaN을 발생시키는 곳에서 atan2는 우아하게 처리됩니다.
이지нг: 수동 제작, 들어오는 전환에 적용
각 keyframe은 그 안으로 전환되는 easing curve를 소유합니다. 곡선은 수동으로 작성되어 모든 플랫폼에서 동일합니다:
case KeyframeEasing.linear: return t;
case KeyframeEasing.easeInOut: return t * t * (3 - 2 * t); // smoothstep S-curve
case KeyframeEasing.easeIn: return t * t; // quadratic
case KeyframeEasing.easeOut: return 1 - (1 - t) * (1 - t);
3. ±180° seam: 모든 360 기능에 나타나는 버그
여기에 함정이 있습니다. Yaw는 원형으로 존재합니다: +179°와 -179°는 358°가 아니라 2° 떨어져 있습니다. 피사체가 구체의 뒤편을 가로지르는 순간, 순진한 수학은 카메라를 세상의 절반만큼 이동시킵니다. 이 단일 문제는 시스템의 네 가지 다른 계층에서 나타나며, 각 계층마다 고유한 수정이 필요합니다.
계층 1 — 기본 요소. 전체 코드베이스가 의존하는 두 가지 작은 헬퍼:
static double normalizeYaw(double yaw) {
while (yaw > 180) { yaw -= 360; }
while (yaw < -180) { yaw += 360; }
return yaw;
}
// "CRITICAL for seam-safe tracking ... avoids 180° snaps"
static double shortestYawDelta(double from, double to) {
double delta = to - from;
if (delta > 180) delta -= 360;
if (delta < -180) delta += 360;
return delta;
}
계층 2 — keyframe 생성은 연속적인 (무한한) yaw를 축적하여 SLERP가 항상 최단 경로로 보간하도록 합니다. 모든 샘플을 ±180°로 clamping하는 대신, 우리는 최단 deltas를 합산하고 실행 값을 의도적으로 180°를 넘어서도록 합니다:
final normalizedContinuousYaw = SphericalCoordinates.normalizeYaw(continuousYaw);
final yawDelta = SphericalCoordinates.shortestYawDelta(normalizedContinuousYaw, rawCoords.yaw);
continuousYaw = continuousYaw + yawDelta; // may exceed ±180 on purpose
coords = SphericalCoordinates(yaw: continuousYaw, pitch: rawCoords.pitch);
계층 3 — bounding box 재구성. 사용자가 seam을 가로지르는 box를 그릴 때, 네 모서리는 +170°, +175°, -175°, -170°와 같은 yaw를 보고합니다. SphericalProjection은 이를 감지하고 (어떤 corner > 90° and 어떤 corner < −90°인 경우) 음수 값을 +360°만큼 이동시켜 연속적인 yaw의 "seam-safe" bbox를 재구성한 후 그 span을 측정합니다.
계층 4 — 실시간 플레이어는 shortestYawDelta를 사용하여 목표를 향해 부드럽게 움직이므로, seam을 가로질러 dragging해도 결코 갑자기 멈추지 않습니다.
360 tooling을 구축할 때 한 가지 기억해야 할 점: seam은 edge case가 아니라, cross-cutting concern입니다. yaw가 나타나는 모든 곳에서 이를 고려하세요.
4. Insta360/GoPro처럼 느껴지게 만들기
부드러운 interpolation은 기술적으로 정확한 카메라를 제공합니다. 하지만 좋은 카메라는 아닙니다. 세 가지 "감성 엔지니어링"이 이 간극을 메웁니다.
Motion constraints — 속도 및 가속도 clamping. Raw tracking data는 jittery합니다. 우리는 keyframes를 MotionConstraints를 통해 전달하여 가상 카메라가 얼마나 빠르고 급격하게 움직일 수 있는지 제한합니다 (예: maxYawSpeed = 120°/s, maxPitchSpeed = 90°/s, maxAcceleration = 180°/s²), cinematic(), responsive(), production() presets과 함께 사용됩니다. 이것이 "파리를 tracking하는 security camera"와 "steady hand를 가진 operator"의 차이입니다.
Adaptive FOV — 피사체에 맞게 zoom. 우리는 equirectangular space에서 피사체의 angular size를 측정하고, 프레임의 target fraction을 채우도록 FOV를 선택합니다:
final angularWidth = (bboxWidth / videoWidth) * 360.0;
final angularHeight = (bboxHeight / videoHeight) * 180.0;
final objectAngularSize = math.max(angularWidth, angularHeight);
final idealFov = objectAngularSize / targetFillRatio; // targetFillRatio ≈ 0.4
return idealFov.clamp(minFov, maxFov); // 45°–120°
Motion lead + face→body blend. 우리는 bbox 너비의 약 15%만큼 framing을 이동 방향으로 앞당겨, 피사체가 걸어가는 가장자리에 pinned되지 않도록 합니다. 그리고 face detection이 drops out될 때, 우리는 body center로 snap하지 않고 — 마지막으로 알려진 face center에서 body center로 ~10 frames에 걸쳐 lerp합니다.
5. 두 가지 영상 트릭: 미리보기 proxy vs. 원본 고해상도
이것은 전체 시스템을 실제 휴대폰에서 사용 가능하게 만드는 아키텍처적 결정입니다.
360° GoPro/Insta360 파일은 종종 4096×2048 HEVC입니다. 저가형 Android decoders는 객체 tracking을 동시에 실행하는 것은 물론, 이를 smoothly 재생하려고 시도할 때도 choke합니다. 그래서 우리는 transcoded proxy (~1440×720, libx264 -preset veryfast -crf 28)에서 tracking 및 live preview를 실행하고, 최종 export만을 위해 full-resolution original을 보존합니다.
// "more reliable than MediaMetadataRetriever for 360° videos
// which often use unusual codecs (HEVC, high-res)"
final maxSafeWidth = 2048, maxSafeHeight = 1080;
// 2:1 4K (4096×2048) is unsafe -> trigger transcodeForPlayback()
반드시 처리해야 할 문제: keyframe bounding box는 proxy coordinates로 계산되며, export 전에 original coordinates로 scale up되어야 합니다. 이 scaling이 잘못되면 export된 영상이 사용자가 preview한 것과 약간 다른 region을 frames합니다. (메타데이터 및 첫 frame extraction을 위해 MediaMetadataRetriever 대신 ffprobe를 사용합니다 — Android의 built-in retriever는 360 cameras가 emit하는 unusual codecs에서 flaky합니다.)
6. GPU export: MethodChannel을 통한 OpenGL + MediaCodec
FFmpeg의 v360 filter를 통해 4K sphere의 모든 frame을 phone CPU에서 re-projecting하는 것은 far too slow합니다. (우리는 v360 string을 유지합니다 — 이는 projection semantics, v360=e:flat:... 즉 "equirectangular in, flat out"과 같은 투영 의미론을 깔끔하게 문서화하지만 — 실제 live path는 아닙니다.)
실제 export는 MethodChannel을 통해 keyframes를 native OpenGL ES + MediaCodec renderer로 전달합니다:
final result = await _methodChannel.invokeMethod('exportVideoGPU', {
'videoPath': resolvedVideoPath
'outputPath': outputPath
'keyframes': keyframesList
'initialOrientation': initialOrientationMap
'width': settings.exportWidth
'height': settings.exportHeight
'fps': settings.outputFps.toInt()
'includeAudio': settings.includeAudio
if (isTrimmed) 'trimStartMs': trimStartMs
if (isTrimmed) 'trimEndMs': trimEndMs
});
우리는 이를 capability check (Android API 21+, 하드웨어 H.264 encoder, OpenGL ES 3.0) 뒤에 두고 EventChannel을 통해 progress를 다시 streaming합니다. 몇 가지 어렵게 얻은 gotchas:
- -90° yaw offset. 우리의 Dart convention은 equirectangular image의 중앙(u = 0.5)에 yaw = 0을 둡니다; OpenGL renderer는 u = 0.75에 yaw = 0을 둡니다. 따라서 모든 keyframe yaw는 channel을 통과하는 동안 -90° (및 ±180°로 re-wrapped)로 다시 매핑됩니다 — export channel과 live-player channel 모두에 대칭적으로 적용되어 preview와 export가 일치하도록 합니다.
- 퇴화된 keyframe 개수. keyframes가 0개인 경우 → initial orientation에서 두 개의 동일한 keyframes (static export)를 synthesize합니다. keyframe이 1개인 경우 → 이를 duplicate합니다. renderer는 항상 start와 end를 원합니다.
- Trimming은 timestamps를 re-bases합니다. trimmed export는 모든 keyframe을 t − trimStartMs만큼 shifts합니다.
아무도 예상하지 못하는 FFmpeg 후처리
GPU export가 finish line이라고 생각할 것입니다. 그렇지 않습니다 — Android의 MediaMuxer는 파일 끝에 moov atom을 작성하고 source의 audio PTS offset을 carry할 수 있기 때문입니다. 결과: ExoPlayer (및 Flutter의 video_player)는 시간이 계속 흘러가는 동안 picture를 freezes합니다. 따라서 GPU pass 후, FFmpeg는 fast, lossless cleanup을 수행합니다:
// copy video (no re-encode -> zero quality loss), re-encode audio to fix PTS,
// move moov atom to the front for instant playback.
-c:v copy -af "aresample=async=1:first_pts=0" -movflags +faststart
그리고 이를 지키는 brutal little gotcha: 우리는 audio track을 먼저 probe합니다. 왜냐하면 audio flags를 no audio track을 가진 video에 passing하면 일부 devices에서 FFmpeg가 hang forever하기 때문입니다. 전체 post-pass는 60-second timeout으로 wrapped되어 있으며, cancel-on-timeout됩니다.
7. 실시간 미리보기 또한 네이티브 플레이어입니다
in-editor preview는 Flutter CustomPaint가 아닙니다 — AndroidView (viewType은 'your_app/spherical360player'와 같음)를 통해 embedded된 native OpenGL surface이며, 자체적인 per-view method/event channel을 가집니다. Dart Spherical360PlayerController는 yaw/pitch/roll/fov를 mirrors하고 sending 전에 동일한 -90° offset을 applies합니다.
쾌적함을 더하는 감성적인 세부 사항:
- Frame-rate-independent smoothing — factor = 1 - exp(-speed * dt)를 사용하여 easing이 60fps와 90fps에서 동일하게 보이도록 하며, seam-safe shortest-path yaw가 baked in됩니다.
- Momentum/inertia after a fling, with friction-based decay — playback 중에는 disabled됩니다. playback 중에는 camera가 user의 last flick이 아닌 keyframes에 obey해야 하기 때문입니다.
- 하나의 GestureDetector가 onScaleUpdate에서 pan과 pinch-zoom을 함께 처리합니다; double-tap은 play/pause를 toggles합니다. controller boundary에서 FOV는 30°–120°로, pitch는 ±90°로 clamps합니다.
작지만 중요한 UX fix: "tracking"에서 "generating keyframes"으로 switching하기 전에, 우리는 120 ms delay를 insert하여 Flutter가 실제로 "100%"를 paints하도록 합니다. 이것 없이는 final progress frame과 status change가 동일한 microtask batch에 land하여 user는 completion을 never sees합니다.
상태 머신, 간략하게
이 모든 것은 status enum을 driving하는 Riverpod ReframeNotifier에 의해 coordinated됩니다:
idle → loadingVideo → transcoding
→ (detecting | selectingObject | drawingBboxOnPlayer | autoDetectingOnPlayer)
→ tracking → generatingKeyframes → editing → exporting → completed | error
Multiple entry points는 동일한 tracker에 feed합니다: tap-to-detect (YOLO overlay), manual bbox, 또는 Insta360-style draw-directly-on-the-player gesture. 이들은 모두 KeyframeGenerator.production().generate(...) → KeyframeSmoother.smooth(...)로 converge하며, 거기서부터 interpolator가 모든 previewed 및 exported frame을 driving합니다.
배운 점
- 수학을 순수하게 유지하세요. projection/interpolation layer에는 Flutter import가 없어야 합니다. 이것이 testable했던 유일한 이유입니다.
- 방향에는 Quaternion SLERP; scalars에는 LERP. Euler angles을 interpolate하지 말고, zoom에 SLERP를 사용하지 마세요.
- ±180° seam은 cross-cutting concern이며, edge case가 아닙니다. 이는 primitives, generation, projection, 그리고 player에서 reappears합니다.
- conventions를 한 번에, symmetrically하게 reconcile하세요. Dart와 OpenGL 사이의 -90° yaw offset은 두 channel boundaries에 모두 applied되어 preview == export합니다.
- Interaction을 위한 Proxy, output을 위한 original. 이 둘 사이에서 coordinates를 scale하는 것을 기억하세요.
- "rendering 완료" ≠ "correctly 재생." moov atom placement와 audio PTS를 fix하기 위한 FFmpeg post-pass 예산을 책정하고, audio flags를 add하기 전에 probe하세요.
- Feel은 feature입니다. Motion constraints, adaptive FOV, 그리고 motion-lead는 "technically reframed"와 "pro가 shot한 것처럼 보이는" 것을 separates합니다.
결과: 완전히 on-device에서 작동하는 360° reframe editor — subject를 tap하고, track하게 하고, keyframes를 tweak하고, clean flat video를 export할 수 있습니다 — Dart가 충분히 fast할 수 없는 work만을 doing하는 thin native GPU layer를 가진 Flutter로 built되었습니다.